Wavlink router is an ideal choice to cater to the need for a high-speed internet connection. Apart from this, a Wavlink WiFi router is equipped with cutting-edge features which can take your digital journey to new heights. But, in order to take advantage of these features, you have to do Wavlink router setup.
Although the router arrives with the Wavlink router manual, some users find it difficult to understand. This page will be your thorough guide to do Wavlink WiFi router setup. Not only this, but you will also get familiar with various settings of the router that can be altered to refresh the internet usage experience. So, let’s start.
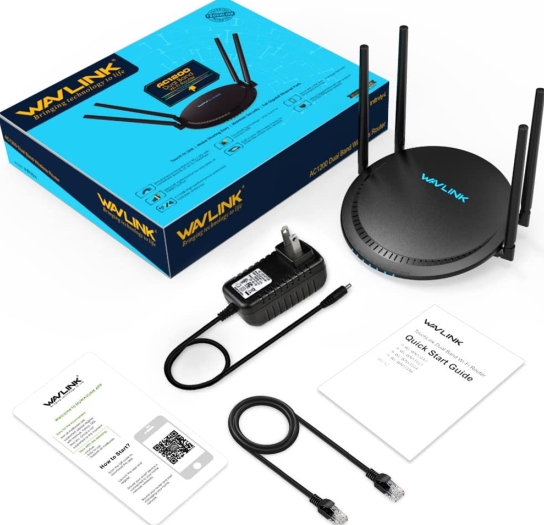
Before you get started with the Wavlink WiFi router setup process, make sure that you have access to a PC and an Ethernet cable. In addition, you will need an already configured modem. FYI, you can perform Wavlink router setup either by accessing the default web URL or IP address.
Give a quick read to the next sections and learn the entire process of configuring a Wavlink wireless router using the Wavlink router default IP address and web address.
That’s it! You have successfully achieved the milestone of doing Wavlink router setup using the default web URL. What happened? Are you unable to do Wavlink WiFi router setup via the web URL? Fret not! The Wavlink router IP address is here for your rescue. Check out the instructions given in the next segment and learn how to make your WiFi router up and running via the Wavlink router IP address.
Ta-da! You can now commence your new digital journey after doing Wavlink router setup. Just in case, you face any issues during the Wavlink WiFi router setup process, get in touch with our experts.
The Wavlink router login page acts as a doorway to complete the installation process. It means it is necessary to access the login page in order to get success with the Wavlink WiFi router setup process. However, a lot of users struggle to do so and end up having problems. If you have also mentioned your name in the list of such users, walk through the following tips to get rid of the issue in hand:
Incorrect entree in the Wavlink router IP address is one of the most common reasons pulling you back from accessing the login page.. Let us tell you that a typo in the Wavlink router IP address won’t take you to the router login screen. Thus, be careful while making the IP address entree..
Perhaps, you were in a hurry while accessing the Wavlink router admin login screen due to which you entered the URL or IP address into the browser’s search box. Know that using the search box won’t take you to the Wavlink router login page but to some anonymous results. Therefore, it is strictly suggested to use the address field of the internet browser.
Do you keep ignoring updates on your web browser? If you are nodding your head in yes, then you will never get success in reaching the Wavlink router admin login page. Thus, make sure you use an up-to-date internet browser. Additionally, deleting the cache, cookies, and browsing history will also lead to the prevention of loading of the cached version of the Wavlink router login page.
When we say viruses, you can imagine the havoc they can cause to your home network. Therefore, they might also be one of the reasons that are creating hurdles in the path of reaching the Wavlink router admin login page. What experts suggest is to remove viruses and other suspicious files from the PC you are using to access the Wavlink router login page.
The shaky router-modem connection can also stop you from reaching the Wavlink router login page. What type of connection source you have used? Wired or wireless? If you have used a wire, then consider checking its physical condition. It must not be deteriorated from any end and the connection must be firm. The wireless source users need to scale down the magnitude of distance between the Wavlink WiFi router and modem. However, these devices can be placed closer up to an extent. Once you are done mitigating the shakiness of the router-modem connection, check if you are able to access the Wavlink router admin login page.
If none of the aforesaid tips bring you success in accessing the Wavlink router login window, consider connecting with our professionals for expert advice. They will let you know about the mistakes done by you in reaching the Wavlink router admin login page and how to rectify them.
Now that you have done Wavlink router login, let’s go ahead and shed light on various settings that can be tweaked to secure the home network and customize the digital experience. After performing Wavlink WiFi router setup, you can change the Wavlink router password, update its firmware, or even alter the WiFi settings. Moving on, let’s discuss the process to change the Wavlink router password.
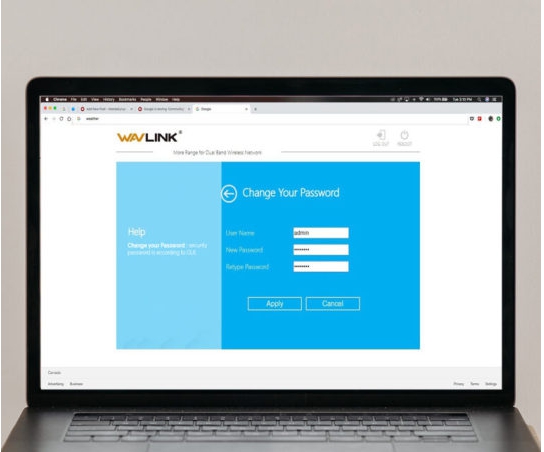
Changing the default Wavlink router password after the installation process is necessary. The reason being, the acquaintance of every third person with the default Wavlink router password. If not changed, then it will be easy for cyberpunks to access and manage your Wavlink router their way. To avoid it from being happened, you can customize the Wavlink router password. You can take the help of the Wavlink router manual to know the steps to change the router’s password. In case the Wavlink router manual doesn’t help you out, read these instructions:
Quick Tip:The Wavlink router password must be as strong as possible. You can use a combination of letters, digits, and special characters.
This is how you can change the Wavlink router password. Now, unauthorized users won’t be able to access your Wavlink WiFi router. Bear in mind to use the new passphrase for the future Wavlink router admin login.
After securing your Wavlink router with a strong password, you need to escalate its performance. Keeping the firmware updated is a good idea for the efficient working of the Wavlink WiFi router. The following instructions will provide you with a brief overview of the Wavlink router firmware update process:
Now, your Wavlink router will run with new features. In case you want to tweak other settings of the router, refer to the Wavlink router manual. However, our experts are always on their toes to help you if you face any issue with your Wavlink WiFi router.
Disclaimer: Wavlinklogin.com is an informational website that helps users to deal with issues related to Wavlink WiFi devices. Any depiction of images, logos, trademarks, and product images are just for informational purposes as we are not involved with any organization or brand. We advise users to use the information given on this website at their own discretion.